
Results 1 to 1 of 1
-
March 12th, 2015, 11:29 PM #1
 Member


- Join Date
- Jun 2011
- Location
-
Wabash,
Indiana
- Posts
- 69
- Rep Power
- 1221537
 Savage MkII and 93r Bolt Guide Pin Problem And Replacement
Hi Folks,
I noticed my Savage MkII wasn't acting right, so I parked it until I could take a look at it.
A couple weeks ago a decided to resurrect it. It is a good-shooting rifle. A new trigger was a must, so I ordered a Rifle Basix.
I was aware of some bouncing going on when the bolt was closed. I figured I'd look into this when installing the trigger.
I washed grease away (I keep camming surfaces greased) and found this:
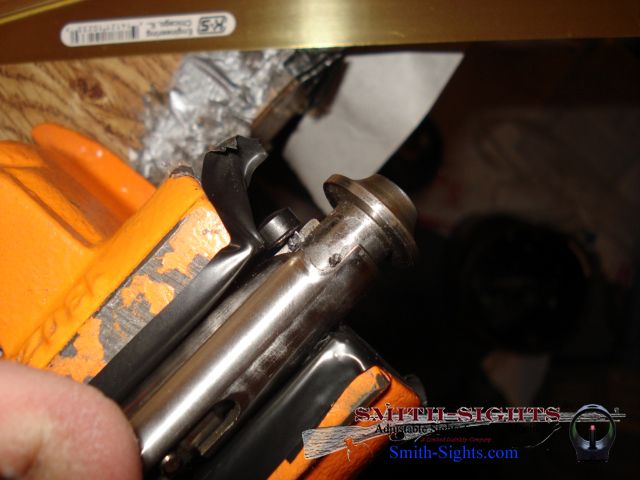
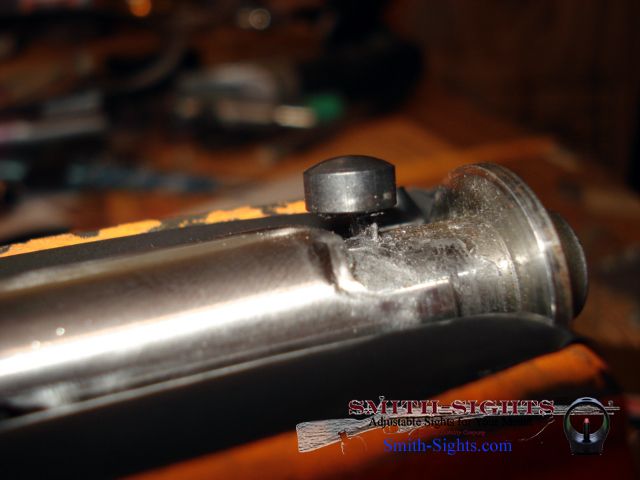
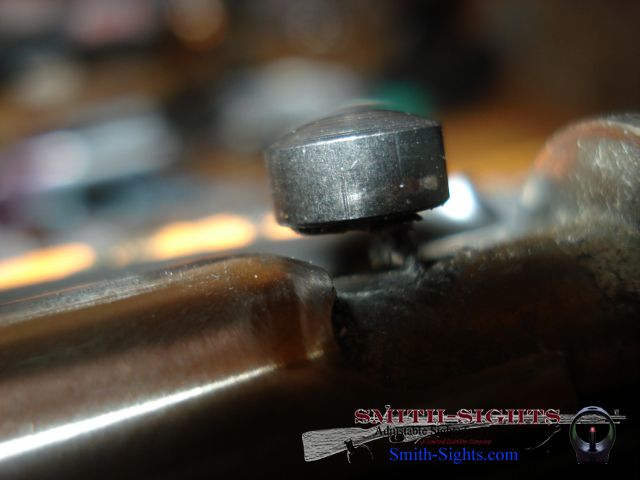
I can't believe Savage (Lakefield) would make a piece like this, this soft. This is negligent.
Going through the cocking process, the rifle being a cock-on-opening:
1. The bolt handle is lifted. At this time, the rear of the bolt cams against the guide pin, which bears considerable weight as the striker is moved back.
2. The bolt is moved rearward, extracting and ejecting the empty shell.
3. The bolt is moved forward, stripping and chambering a new round.
4. The bolt handle is lowered, allowing the firing pin pressure to transfer slowly to the sear.
The guide pin holds the striker back until it transfers it off on #4.
The sear on this particular rifle is at a negative angle. That's OK; it's designed this way so that the bolt can override the sear spring when the trigger is pulled.
However, with the guide pin worn like this, the striker is far enough forward that it will strike the sear quickly.
Striking the sear quickly, in this design, bounces the sear. Sear bounce is bad. In this design, it bounces the sear right off the trigger and onto the Accutrigger blade.
I'm starting to suspect I know why the Accutrigger blade was invented...
Enough of these bounces ruins the sear faces.
As well, you cannot cycle the rifle quickly and expect it to stay cocked. Even with the Accutrigger, this is a dangerous condition.
Now, let's look at #3 specifically.
Between the time the round strips from the magazine and the time the bolt handle (which is the locking lug on this rifle as well as most .22LR bolt actions) the potential exists for the guide pin to break and send the firing pin crashing into the rim.
Remember, the tension on the guide pin is released only when the striker spring's tension is transferred to the sear, which doesn't happen until the bolt handle is in the "down" position.
A worn guide pin is hard to detect during a cursory examination for a few reasons. The fact that it's not supposed to wear is the most obvious, but the other reasons follow:
- First, the wear is hidden. Symptoms (slipping of the sear to the Accutrigger a lot, for example) are generally all you get. The top of the guide stays intact and it doesn't appear anything's wrong with it. In fact, the symptoms would lead one to first suspect problems with the sear engagement surface on the hammer, which is generally peened and sloped by this time from sear bounce, further reinforcing the idea that it's a problem with the sear and/or the trigger. This is further compounded by the fact that the trigger assembly appears soft (at least on my example).
- Second, it wears slowly enough that metal shavings (or in this case, powder) are generally wiped away with a cloth during field cleaning, or is carried into the bolt body when the striker drops.
- Third, this bolt is not easy to take down. It's doable, of course, but not nearly as easy as, say, a Mosin-Nagant bolt or a Gewehr 88 bolt, or for that matter, a Lee-Enfield, Mauser, Arisaka, 1903, or dang near any other bolt I can think of off the top of my head. A lot of folks have troubles taking down even their surplus rifle's bolts, and would never attempt something like this. You don't take the bolt down, you don't realize there's a problem.
So, the symptoms point to something else, masking the true problem, and the problem is visually hidden from sight.
I wonder how many of these are floating around out there. Heat treating is done in batches, and so mine cannot be the only one. For reference, the my MkII's serial number is 1302XXX .
Day 2, Repair:
I'm skimping on pics today. All I had is the 3mp camera I keep at the shop, and the pics aren't the greatest.
Refer to the numbered pic below.
To disassemble, rotate the bolt to the fired position. Chuck an 8mm open end wrench (3) into a vice. Pull the front (7) and rear parts of the bolt apart against spring pressure, and lower the exposed nut (8) onto the 8mm wrench. Spin the front section of the bolt off the nut. Set it aside; the front doesn't need to come apart further for this repair.
Pad the vice and chuck the rear section of the bolt (10) into the vice. Compress the spring using your fingers or a 7mm box end wrench and pull the E-clip off the striker. Slowly release the spring so it doesn't go flying.
You can now pull the spring (5) and nut (8) off.
Pull the striker (9) back until you see the sear contact pin (6) through the witness hole. Push it out with a punch; it's not a press fit and should readily come out.
You can now pull the striker (9) out of rear of the bolt body (10).
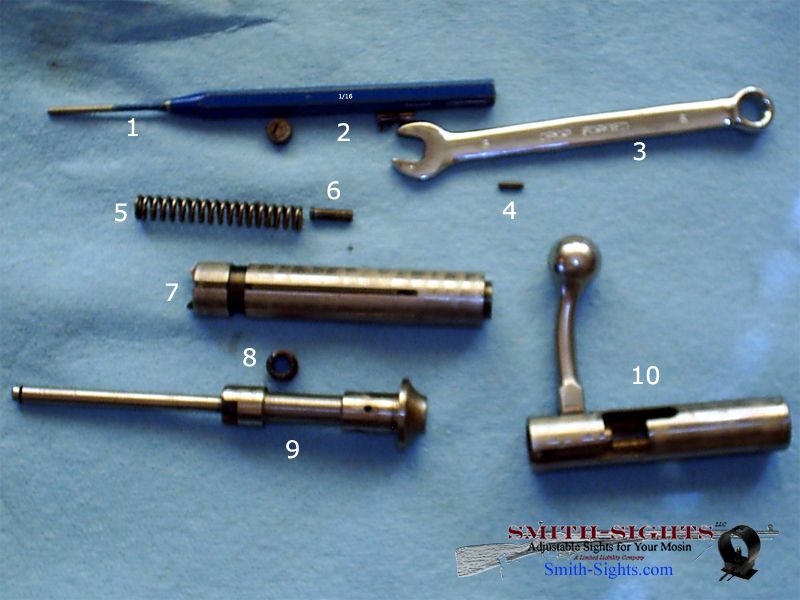
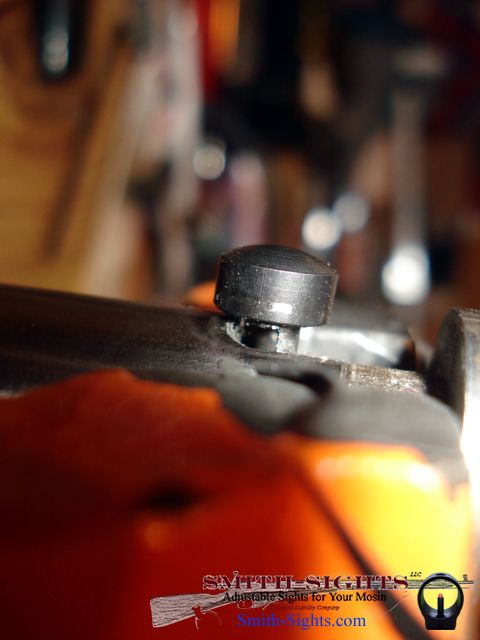
Tap the tension pin (4) out of its hole with a 1/16" punch. This will release the guide pin (2 -- shown in two parts because it broke upon disassembly!)
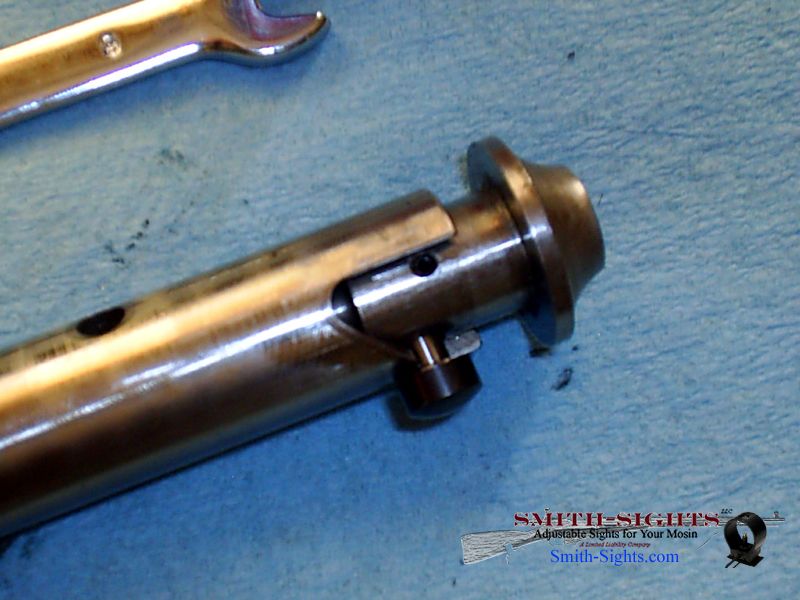
Upon inspection, I found the cam surfaces to have a rough and jagged edge, much like a file. I took some time with my stone set and smoothed those out.
The guide pin should turn in its socket without catching. Mine didn't; it caught with the tension pin in place. I took time to polish the guide pin hole with first 800 then 2000 grit wet/dry, and I polished the tension pin as well.
The guide pin received 2000 and 3000 grit polish, as did the bolt sear contact pin.
After you're satisfied with the fit and polish of parts, assemble them, checking again as you go.
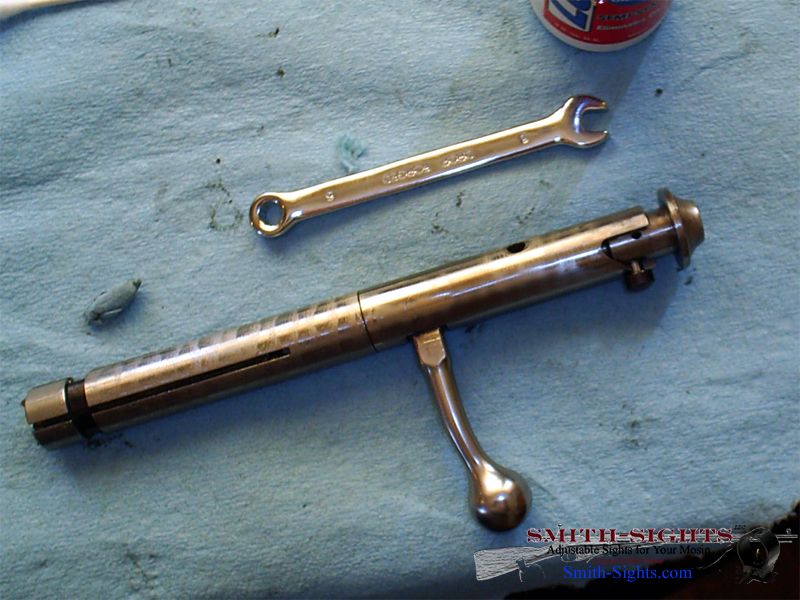
Nothing to it! It's not as irritating as some bolts, but not as easy as others. I would rate the Mosin-Nagant, Gewehr 88, and Mauser 98 bolts as a 1 in difficulty on a 1-10 scale. This would rate about a 3 in my opinion, due to the need for tools.
Hope this helps someone.
Regards,
Josh


 Reply With Quote
Similar Threads
-
Help me decide...Marlin 60, Savage MKII FV, or Savage MKII FV-SR
By floppy ears in forum RiflesReplies: 18Last Post: January 22nd, 2014, 10:53 PM -
Savage MKii Feeding Problem
By MMH in forum RiflesReplies: 4Last Post: January 13th, 2013, 09:50 PM -
Savage MkII Bolt 22LR Problems.
By MMH in forum RiflesReplies: 2Last Post: December 12th, 2010, 02:01 PM -
Kahr MK9 spring guide rod replacement
By Robert Kayland in forum GeneralReplies: 24Last Post: November 4th, 2008, 09:45 AM

Bookmarks